Dry Brining Steak Explained
Tested in a Real Home Kitchen
Every technique in this guide was tested on a home gas stove using a 10-inch cast iron pan. Results, temperatures, and timings reflect what actually happened — not what should happen in theory.
Dry brining is one of the few cooking techniques where doing less — applying salt and waiting — produces a dramatically better result than anything active you could do during that same time. I resisted it for years because it seemed too passive to make a real difference. The first time I actually tested it side by side against an unsalted same-day steak, the result was not subtle.
This guide explains exactly what happens during a dry brine, why timing matters, and what the difference actually looks and tastes like.
What Happens at 0 Minutes, 30 Minutes, and 8 Hours
Salt applied to raw steak draws moisture to the surface via osmosis. At 0–30 minutes: the drawn moisture sits on the surface as salty liquid. This is the worst possible time to cook — you're adding wet, salt-saturated surface moisture to a pan that needs a dry surface to produce browning.
At 30–45 minutes: osmosis reversal begins. The dissolved salt starts to reabsorb back into the meat, carrying the salt with it. By 45 minutes, most of the drawn moisture has returned into the protein, and the surface is approaching dry again.
At 8–24 hours (fridge, uncovered): the salt has fully distributed through the outer layers of the protein. Additionally, the refrigerator air — cold and dry — has evaporated the remaining surface moisture. The surface is now drier than it would be from patting alone. When this surface hits a hot pan, the Maillard reaction begins in seconds because there is essentially no moisture to evaporate first.
Pro Tips
- Always preheat your pan for at least 2 minutes on high before the steak goes in — not medium-high, high.
- Pat the steak completely dry immediately before cooking, even if you dry-brined it overnight.
- Pull the steak 5°F below your target temperature and let carryover cooking cover the gap during rest.
- Use a heavy-bottomed pan — thin pans lose temperature when the cold steak hits them and you lose the crust.
- Rest on a wire rack, not a cutting board — the board traps steam under the steak and softens the crust.
The Side-by-Side Test
I cooked three identical ribeyes: one unsalted (patted dry only), one salted 30 minutes before, one dry-brined overnight. Same pan, same heat, same timing.
The unsalted steak produced a decent crust. The 30-minute salted steak was worse than unsalted — the surface moisture was still elevated, and the crust took longer to form. The overnight dry-brined steak was noticeably different the moment it hit the pan — loud, immediate sizzle, crust formation visible within 60 seconds, deeper and more uniform browning than either other steak.
The flavor difference was real but secondary to the crust difference. The dry-brined steak was seasoned more evenly throughout. But the crust was the main event — it was just categorically better.
Step-by-Step
- 1
How Dry Brining Works — The Three-Stage Process
Stage one (0-30 minutes): salt draws moisture to the surface via osmosis. Stage two (30-45 minutes): the drawn-out moisture begins to dissolve the salt and reabsorb back into the meat. Stage three (45+ minutes): the salted moisture has fully reabsorbed, distributing seasoning throughout the protein. The fridge environment also dries the surface — combining seasoning depth with ideal sear-ready surface conditions.
- 2
Overnight Is Better — The Science
While 45 minutes is the minimum for effective dry brining, overnight dry brining (8-24 hours) allows the salt to partially denature surface proteins. This acts as a tenderizer and allows the surface to form a crust more rapidly when seared. The fridge air during overnight brining removes all surface moisture, giving you a steak that can form a crackling crust in under 2 minutes of contact with a hot pan.
- 3
How Much Salt and What Type
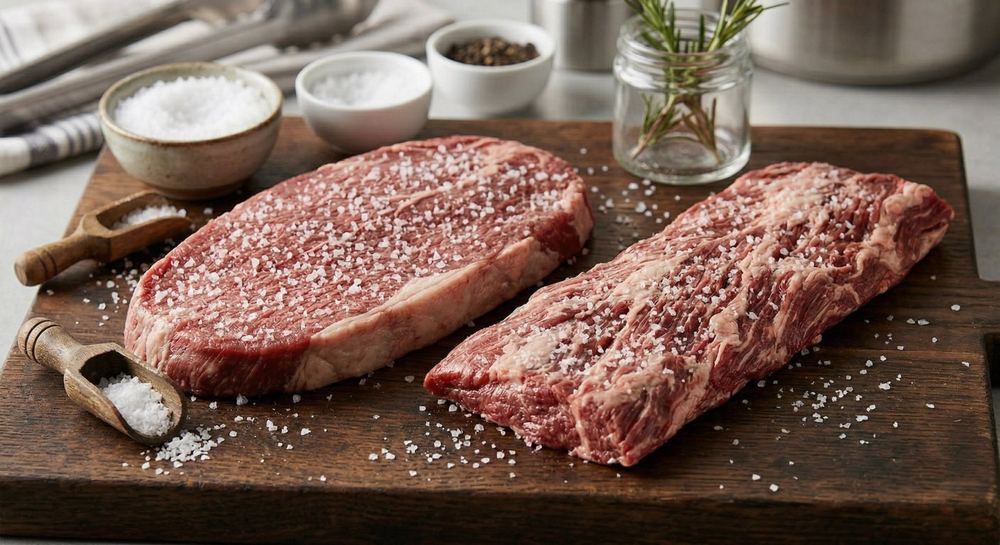
Use kosher salt — its coarser crystals distribute more evenly and are easier to apply by hand than fine table salt. The right amount: approximately 3/4 teaspoon of Diamond Crystal kosher salt per pound of meat. Apply generously to all surfaces including the fat cap. You are looking for a visible but not caked coating — roughly the amount of seasoning you can pick up in three finger pinches per side.
- 4
Dry Brine vs Wet Brine for Steak
Wet brining adds moisture to the protein through osmosis but dilutes the flavor. Dry brining concentrates and enhances flavor while retaining the natural moisture of the meat. For steak specifically, dry brining is strictly superior — it maintains the integrity of the natural juices and flavor compounds. Wet brining produces a slightly waterlogged texture that is noticeable with beef.
- 5
What Happens to the Surface During Fridge Rest
When a dry-brined steak sits uncovered in the fridge, the cold dry fridge air slowly evaporates residual surface moisture over hours. After 8 hours, the surface is almost tacky-dry. After 24 hours, it may look slightly darker and feel very dry to the touch. When this perfectly dry surface hits a screaming-hot pan with oil, the Maillard reaction begins in seconds — this is why steakhouses can produce a perfect crust so quickly.
Common Mistakes
The most common mistakes with this technique — and why each one produces a bad result:
- Not drying the surface: Wet steak steams before it sears. The first 30–60 seconds in the pan are wasted evaporating moisture instead of building the Maillard crust. Always pat dry immediately before cooking.
- Pan not hot enough: The most common mistake. If you don't hear an immediate, aggressive sizzle the moment the steak hits the pan, remove the steak and heat the pan longer. A tepid pan means no crust.
- Moving the steak too early: The steak sticks initially because proteins are bonding with the metal. Leave it alone — it will release naturally when the crust is formed. If you force it, the crust tears.
- Cutting before resting: A steak cut immediately after cooking loses 30–35% of its moisture onto the board. A rested steak loses under 10%. The rest period is not optional.
- Cooking straight from the fridge: A cold steak means the outside overcooks before the center reaches temperature. Take steak out 20–30 minutes before cooking.
Start Tonight for Tomorrow's Dinner
Salt your steak tonight. Use about 3/4 teaspoon of Diamond Crystal kosher salt per pound, applied to all surfaces including the fat cap. Set it on a wire rack over a sheet pan and leave it uncovered in the fridge. Cook it tomorrow. That's the entire technique. The refrigerator does the work.
Why I Don't Add Pepper Until the Pan
Pepper applied before cooking burns at searing temperatures — not dramatically, but enough to add a bitter note to the crust. I add pepper immediately before the steak goes into the pan, not during the dry brine. The salt needs time to work. The pepper doesn't — it's purely surface flavoring that takes effect instantly and doesn't benefit from extended contact time.
Method Comparison
| Method / Type | Key Difference |
|---|---|
| Cast iron pan | Best heat retention, produces the best crust. Gets extremely hot and stays hot when cold steak hits it. |
| Stainless steel pan | Easier to make pan sauces in — more reactive to heat changes. Requires a bit more oil. |
| Grill | Adds smoke and char. Harder to control doneness. Best for thinner steaks. |
| Oven (reverse sear) | Best for thick steaks (1.5 inch+). Most even doneness from edge to edge. |
Step-by-Step: Dry Brining Steak Explained
Pro Tip — The 45-Minute Salt Rule
Salt your steak either immediately before cooking, or at least 45 minutes before. In between 1–44 minutes, the drawn-out moisture sits on the surface and steams the steak instead of searing it. Overnight dry-brining in the fridge gives the absolute best crust.
Steak Doneness Temperature Reference
| Doneness Level | Internal Temp (°F) | Internal Temp (°C) | Visual Description |
|---|---|---|---|
| Rare | 120–125°F | 49–52°C | Bright red center, very soft to touch |
| Medium Rare | 130–135°F | 54–57°C | Warm red center, juicy — chef's recommendation |
| Medium | 140–145°F | 60–63°C | Pink center, slightly firmer texture |
| Medium Well | 150–155°F | 65–68°C | Slightly pink, noticeably less juicy |
| Well Done | 160°F+ | 71°C+ | No pink visible, fully cooked through |
Steak Doneness Visual Guide
Steak Doneness Visual Guide
Rare
120–125°F
Med Rare
130–135°F
Medium
140–145°F
Med Well
150–155°F
Well Done
160°F+
Common Mistakes to Avoid
Even experienced cooks make consistent mistakes with this technique. Understanding them upfront saves hours of trial and error:
- Wrong temperature: Cooking at the wrong heat level — usually too low when browning is the goal — is the single most common error.
- Skipping prep steps: Steps like drying the surface, salting in advance, or bringing food to room temperature are easy to skip and dramatically affect the result.
- Guessing instead of measuring: An instant-read thermometer removes all guesswork. Professional kitchens rely on thermometers, not timing, for every protein.
- Rushing the process: Most techniques have non-negotiable waiting periods — rest times, brining windows, reducing steps. Patience is a cooking skill.
Frequently Asked Questions
Medium rare steak should reach 130–135°F (54–57°C) internally. Remove from heat at 128–130°F as carryover cooking during the rest period will bring it to the ideal temperature.
Rest steak for a minimum of 5 minutes for thin cuts and up to 10 minutes for thick steaks over 1.5 inches. The rest allows juices to redistribute. Tent loosely with foil to keep it warm.
Professional chefs typically oil the pan, not the steak. Adding a small amount of high-smoke-point oil to a very hot pan gives better control. For grilling, oiling the steak directly also works.
Steak sticking is almost always a heat issue. The pan needs to be hot enough that the Maillard reaction happens immediately on contact — creating a crust that naturally releases from the surface.
Key Takeaways
- Always dry your steak surface before searing — moisture prevents browning
- Salt at least 45 minutes before cooking, or just before cooking — never in between
- Use a cast iron or stainless steel pan, never nonstick, for proper crust development
- Rest your steak for at least 5 minutes before slicing to retain all the juices