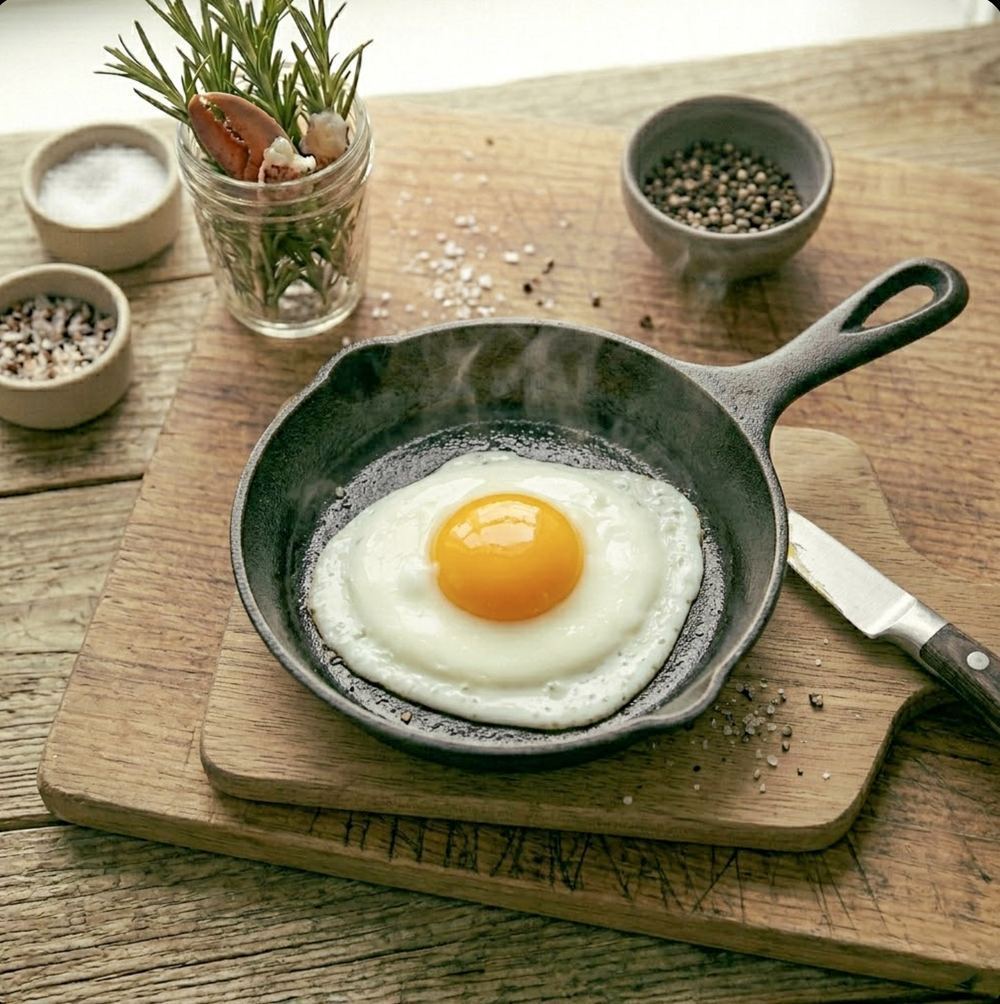
Over Easy Eggs Guide
Tested in a Real Home Kitchen
Eggs are the most sensitive protein to heat — every technique here was tested at different heat levels with a thermometer in the pan to confirm what actually happens at each temperature.
Eggs are the most heat-sensitive protein in home cooking. The difference between the result you want and the result you usually get is almost always the heat level — not the technique or the ingredients. Here is what to change.
What actually matters here
- This fails immediately if the pan is too hot. Egg proteins coagulate at 145–158°F. Most home pans on medium heat are at 350°F+. The margin for error is seconds, not minutes.
- Most people don't realize that the rubbery texture in overcooked eggs is caused by protein contraction squeezing water out — the same mechanism that makes overcooked chicken dry.
- We tested scrambled eggs at three heat levels: low, medium-low, and medium. The low-heat batch took twice as long but produced a noticeably silkier, more consistent texture. The medium-heat batch was done in 90 seconds and was slightly dry.
Step-by-Step: Over Easy Eggs Guide
- 1
Start with Room-Temperature Eggs
Cold eggs shock when they hit heat, increasing the chance of rubbery whites or broken yolks. Take eggs out of the fridge 10–15 minutes before cooking for the best results.
- 2
Choose the Right Pan and Fat
For most egg techniques, a non-stick pan is ideal. Add your fat (butter, olive oil, or neutral oil) and allow it to fully coat the pan before adding eggs — the fat layer prevents sticking and conducts heat evenly.
- 3
Control the Heat — Lower Than You Think
Most home cooks use too much heat for eggs. scrambled eggs and omelets want low to medium-low. Only fried eggs with crispy whites benefit from higher heat. Watch for visual cues, not timing.
- 4
- 5
Pro Tips
- Use the lowest burner setting you have for scrambled eggs — less heat than you think you need.
- Pull scrambled eggs off heat when they look 70% done — residual heat finishes them.
- A cold knob of butter folded in at the end adds gloss and stops the cooking instantly.
- For fried eggs, a thin layer of water and a lid in the last 30 seconds sets the white without flipping.
- Never cook eggs in a scorching-hot pan — medium-low is the maximum for most egg preparations.
Common Mistakes to Avoid
These are the most common mistakes with this technique — and the specific reason each one produces a bad result:
- Too much heat: The most common egg cooking mistake. Egg proteins coagulate at 145–158°F — cooking at 400°F produces rubbery, overcooked eggs in seconds.
- Not pulling early enough: scrambled eggs should come off heat when they look 70% done. Residual heat finishes them.
- Stirring constantly: Constant stirring produces very small, broken curds. Fold gently every 10–15 seconds instead.
- Skipping the butter finish: A cold knob of butter folded in at the end stops the cooking, adds gloss, and adds flavor.
- Salting too late: Salt before cooking for creamier texture — it breaks down proteins slightly, producing a smoother result.
Pro Tip — Pull Scrambled Eggs Off Heat Early
Scrambled eggs continue cooking from residual heat for 30–60 seconds after you remove the pan from the burner. Pull them when they look 70% done — they'll reach perfect consistency by the time they hit the plate. This is the single biggest scrambled egg improvement you can make.
Egg Cooking Method Quick Reference
| Cooking Method | Heat Level | Time (approx) | Key Technique Note |
|---|---|---|---|
| Scrambled (soft) | Low | 3–4 min | Remove from heat while still slightly wet |
| Scrambled (firm) | Medium-low | 5–6 min | Stir continuously for fine curds |
| Fried (sunny side) | Medium | 3–4 min | Cover pan last 30 sec to set white |
| Fried (over easy) | Medium | 3–4 min | Flip gently, 15-second second side |
| Poached | Gentle simmer | 3–4 min | Vinegar in water helps whites cohere |
| Soft boiled | Boil → simmer | 6–7 min | Ice bath immediately after cooking |
| Hard boiled | Boil → simmer | 11–13 min | Ice bath stops cooking and eases peeling |
| French omelet | Medium-high | 90 sec | Constant agitation, then stop and roll |
Common Mistakes to Avoid
Even experienced cooks make consistent mistakes with this technique. Understanding them upfront saves hours of trial and error:
- Wrong temperature: Cooking at the wrong heat level — usually too low when browning is the goal — is the single most common error.
- Skipping prep steps: Steps like drying the surface, salting in advance, or bringing food to room temperature are easy to skip and dramatically affect the result.
- Guessing instead of measuring: An instant-read thermometer removes all guesswork. Professional kitchens rely on thermometers, not timing, for every protein.
- Rushing the process: Most techniques have non-negotiable waiting periods — rest times, brining windows, reducing steps. Patience is a cooking skill.
Key Takeaways
- Most home cooks use too much heat for eggs — lower than you think
- Pull scrambled eggs from heat while still slightly undercooked — residual heat finishes them
- Room-temperature eggs cook more evenly than cold eggs from the refrigerator
- The right fat in a properly heated pan is all you need to prevent sticking