How to Cook Chicken Breast Perfectly
Tested in a Real Home Kitchen
These techniques were tested multiple times in a standard home kitchen, comparing results across different pan types and oven temperatures. Pull temperatures and rest times are based on repeated measurements.
Chicken breast is unforgiving. It has almost no fat to buffer the cooking process — so the window between perfectly cooked (juicy, 165°F) and overcooked (dry, 180°F) is about 15°F. Most home cooks blow through that window without knowing it because they're using timing instead of temperature.
This guide gives you the specific temperatures, the technique steps, and — more importantly — the one tool that removes the guesswork entirely.
Why Chicken Breast Gets Dry
Chicken breast is almost entirely lean muscle fiber. Lean muscle fiber contracts significantly when heated — squeezing out the moisture that was held within the protein structure. At 165°F, the fibers have contracted enough to be fully cooked and safe. At 185°F, they've contracted further and expelled significantly more moisture.
The moisture loss between 165°F and 185°F is not linear — it accelerates. A chicken breast held at 185°F for one minute loses dramatically more juice than one pulled at 165°F and rested. This is why timing-based cooking of chicken breast is unreliable: the difference between a perfect breast and a dry one can be 90 seconds on a stovetop.
The carryover cooking factor matters here too. A breast pulled at 160°F will reach 165°F during a 5-minute rest — it carries over about 5°F from residual heat. So the professional approach is: pull at 160°F, rest 5 minutes, serve at 165°F. That's the window that produces juicy chicken with a margin for error.
Pro Tips
- Bring chicken to room temperature for 20 minutes before cooking — cold chicken drops the pan temperature and slows browning.
- Always use a thermometer — visual cues and timing are unreliable for chicken safety.
- Dry-brine uncovered in the fridge overnight for dramatically better skin texture and seasoning depth.
- Sear presentation-side first and do not move the chicken — it will release naturally when the crust forms.
- Rest chicken for at least 5 minutes — cutting immediately loses significantly more juice onto the board.
The Dry Brine Difference
I tested the same chicken breast preparation with and without overnight dry brining. The unbrined breast was fine. The dry-brined breast was noticeably different in two ways: the skin (on a skin-on breast) was significantly crispier because the fridge air had dried it overnight, and the seasoning penetrated deeper into the meat rather than sitting only on the surface.
The texture difference in the meat itself was less dramatic than the skin difference — but still present. The dry-brined breast seemed to handle the cooking process with more tolerance. It was harder to overcook, and at the same internal temperature, it retained slightly more moisture. I use the dry brine on chicken every time I have the planning window to do it.
Step-by-Step
- 1
Dry Brine the Night Before
The single biggest upgrade for chicken breast is overnight dry brining. Apply 3/4 teaspoon of kosher salt per pound, place on a wire rack over a sheet pan, uncovered in the fridge for 8-24 hours. The salt draws moisture out initially, then it reabsorbs, carrying salt deep into the protein. The fridge air simultaneously dries the surface — creating ideal conditions for a proper sear the next day.
- 2
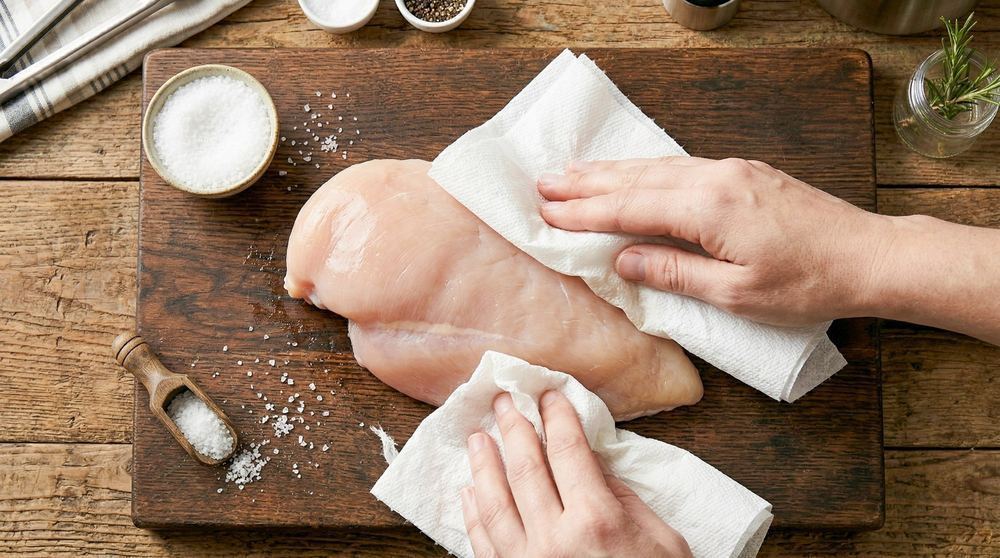
Pat Completely Dry Before Cooking
Even after dry brining, pat the surface completely dry with paper towels immediately before cooking. Any surface moisture must evaporate before browning can occur — this holds the surface temperature at 212 degrees F (the boiling point of water) instead of the 280+ degrees F needed for Maillard browning. For thick breasts, butterfly or pound to even thickness so the thin end does not overcook before the thick end is done.
- 3
High Heat to Build the Crust
Preheat a cast iron or stainless steel pan over medium-high heat until very hot. Add oil, then place the chicken presentation side down. Do not move it for 4-5 minutes. You should hear an immediate sizzle — if it is quiet, the pan was not hot enough. Once a deep golden-brown crust forms and the chicken releases naturally, flip once.
- 4
Finish in the Oven for Even Heat
The challenge with thick chicken breasts: by the time the center reaches safe temperature, the outer layer overcooks on high stovetop heat. The professional solution: sear the presentation side for 3-4 minutes in a hot oven-safe pan, then transfer to a 425 degree F oven for 10-14 minutes depending on thickness. Radiant oven heat cooks the center evenly without overcooking the exterior.
- 5
Pull at 160 Degrees F and Rest 5 Minutes
Insert a thermometer into the thickest part from the side. At 160 degrees F, remove from heat and rest for at least 5 minutes. Carryover cooking will bring the temperature to the FDA safe minimum of 165 degrees F while the rest period allows moisture to redistribute. Slice against the grain — the grain in a chicken breast runs lengthwise, and cutting against it dramatically improves perceived tenderness.
Common Mistakes
The most common mistakes with this technique — and why each one produces a bad result:
- Not using a thermometer: Visual and timing cues are unreliable for chicken. The only way to consistently hit 165°F without overcooking is a thermometer — there is no alternative.
- Too high heat throughout: Chicken needs a sear to develop color, then lower, more even heat to cook the interior. Sustained high heat produces a dark exterior and an undercooked or dry interior.
- Not patting dry: Wet chicken will not brown — it will steam. Pat completely dry even after brining.
- Cutting too early: Chicken breast loses significantly more juice when cut immediately after cooking. Rest for at least 5 minutes.
- Skipping the brine: dry brining overnight is the single highest-impact change you can make. Seasoning depth and skin texture are both dramatically better.
If Your Chicken Breast Is Always Dry
Buy an instant-read thermometer. Cook chicken breast until the thickest part reads 160°F — not 165°F, not 170°F. Take it off the heat. Rest 5 minutes. Slice. That single change (using a thermometer instead of timing or guessing by color) will fix dry chicken breast permanently. Everything else is secondary to this.
The Oven Finish Method I Use Now
I sear bone-in chicken breast skin-side down in a cast iron pan for 4 minutes on medium-high, then flip and transfer the entire pan to a 425°F oven for 14–18 minutes depending on size. This produces better results than stovetop alone because the oven's radiant heat cooks the interior evenly while the cast iron retains heat for the skin. The skin comes out deeply golden and genuinely crispy — the oven finish dries it further in a way that stovetop steaming (from the covered pan method) doesn't achieve.
Method Comparison
| Method / Type | Key Difference |
|---|---|
| Boneless breast | Least forgiving — thin and lean. Pull at 160°F and rest 5 minutes. |
| Bone-in breast | More moisture retention from the bone. Pull at 162°F. |
| Thighs (boneless) | Most forgiving cut. Pull at 175°F for best texture. |
| Whole chicken | Check breast at 165°F and thigh at 175°F — both must be done. |
Step-by-Step: How to Cook Chicken Breast Perfectly
Pro Tip — Trust the Thermometer, Not the Timer
Chicken cooking times vary based on thickness, starting temperature, and oven calibration. An instant-read thermometer is the only reliable way to know if chicken is safe and perfectly cooked. Insert it into the thickest part, avoiding bone.
Chicken Internal Temperature Guide
| Chicken Cut | Safe Temp (FDA) | Ideal Pull Temp | Notes |
|---|---|---|---|
| Breast (boneless) | 165°F / 74°C | 160°F / 71°C | Carryover cooks to 165°F while resting |
| Breast (bone-in) | 165°F / 74°C | 162°F / 72°C | Bone slows cooking — check thickest part |
| Thigh (boneless) | 165°F / 74°C | 175°F / 79°C | Higher temp improves texture significantly |
| Thigh (bone-in) | 165°F / 74°C | 175°F / 79°C | Dark meat benefits from extra heat |
| Whole Chicken | 165°F / 74°C | 165°F breast / 175°F thigh | Check both breast and thigh |
| Wings | 165°F / 74°C | 175°F / 79°C | Higher temp yields crispier result |
Common Mistakes to Avoid
Even experienced cooks make consistent mistakes with this technique. Understanding them upfront saves hours of trial and error:
- Wrong temperature: Cooking at the wrong heat level — usually too low when browning is the goal — is the single most common error.
- Skipping prep steps: Steps like drying the surface, salting in advance, or bringing food to room temperature are easy to skip and dramatically affect the result.
- Guessing instead of measuring: An instant-read thermometer removes all guesswork. Professional kitchens rely on thermometers, not timing, for every protein.
- Rushing the process: Most techniques have non-negotiable waiting periods — rest times, brining windows, reducing steps. Patience is a cooking skill.
Frequently Asked Questions
The FDA recommends 165°F (74°C). In practice, pull chicken breast at 160°F (71°C) — carryover during resting will bring it to 165°F. This results in a noticeably juicier breast.
The most effective methods: dry brine 1–24 hours before cooking, use a thermometer to pull at exactly 160°F, and rest for at least 5 minutes before cutting.
Both work well when done correctly. For the best results, sear in a pan then finish in a 425°F oven — this gives you crust plus even internal cooking.
Key Takeaways
- Pat chicken completely dry before cooking — this is non-negotiable for browning
- Use a thermometer every time: breast at 165°F, thighs at 175°F for best texture
- Dry brining overnight in the fridge yields superior flavor and texture to wet brining
- Resting for 5–15 minutes after cooking prevents juice loss when cutting